Loading repository data…
yohannesgk / repository
blacksmith
BlacksmithAI is an OPEN-SOURCE advanced penetration testing framework that leverages multiple AI agents to automate security assessments. The system orchestrates specialized agents through a complete penetration testing lifecycle, from reconnaissance to post-exploitation using professional security tools in a controlled environment.
Live repository statistics
★ 230Stars
⑂ 41Forks
◯ 0Open issues
◉ 230Watchers
README preview
BlacksmithAI
[OPEN-SOURCE] AI-Powered Penetration Testing Framework
An intelligent multi-agent system for automated security assessment and penetration testing.
A hosted version is available for quick testing without local setup. Blacksmith-AI
Documentation • Quick Start • Architecture • Tools
Table of Contents
- Overview
- Architecture
- Prerequisites
- Installation
- Quick Start with Makefile
- Configuration
- Usage
- Tools & Capabilities
- Agent Workflow
- Troubleshooting
- Documentation
Overview
BlacksmithAI is an opensource advanced penetration testing framework that leverages multiple AI agents to automate security assessments. The system orchestrates specialized agents through a complete penetration testing lifecycle from reconnaissance to post-exploitation using professional security tools in a controlled environment.
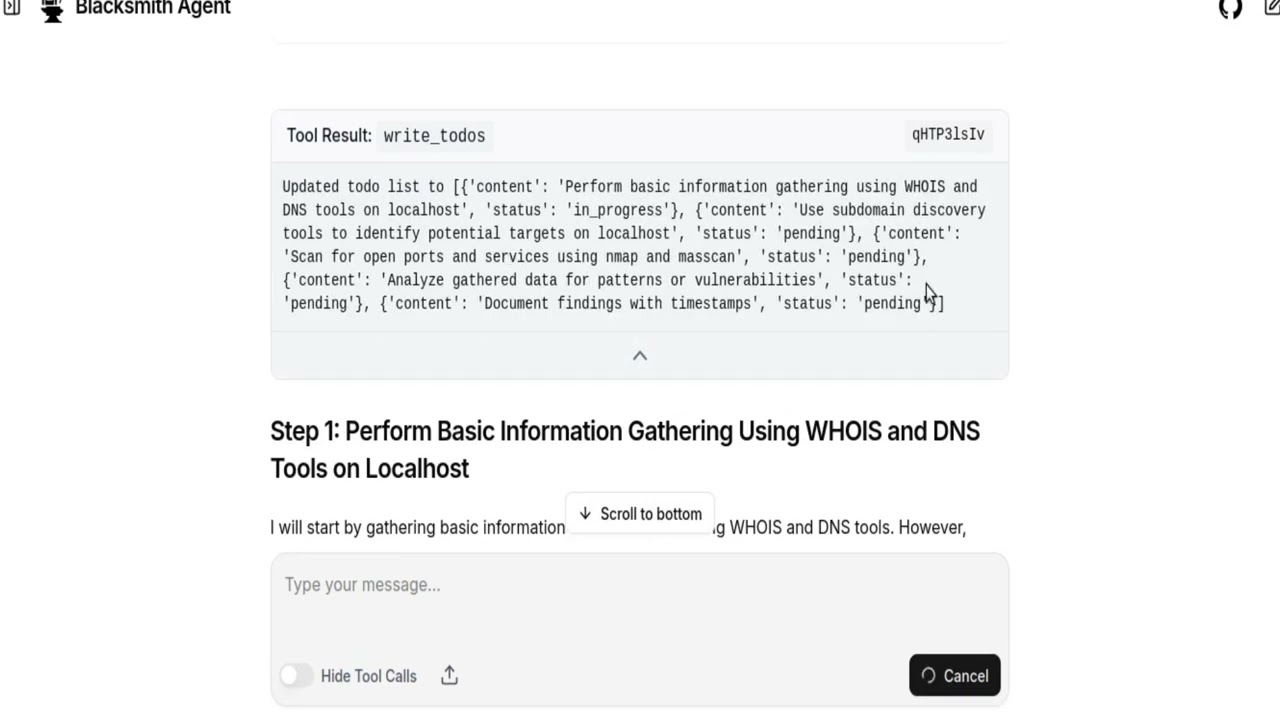
Key Features
- Multi-Agent Architecture: Specialized agents for each phase of penetration testing
- Professional Tooling: Pre-configured Docker image with industry-standard security tools
- Flexible LLM Providers: Supports almost every model and provider e.g. openai, gemini, openrouter, and local models
- Web & Terminal Interfaces: Choose between a modern UI or CLI interaction
- Automated Reporting: Generates comprehensive security reports with evidence
- Safe & Controlled: runs on a controlled docker environment
Use Cases
- Professional penetration testing
- Automated security assessments
- Continuous security monitoring
- Vulnerability discovery and validation
- Security research and development
Architecture
BlacksmithAI uses a hierarchical multi-agent system.
Agent Hierarchy
-
Orchestrator
- Command and control center
- Manages mission planning and task delegation
- Coordinates subagents and generates final reports
-
Specialized Subagents
- Recon Agent: Attack surface mapping and information gathering
- Scan/Enum Agent: Deep scanning and service enumeration
- Vulnerability Analysis Agent: Vulnerability mapping and risk assessment
- Exploit Agent: Proof-of-concept exploitation
- Post-Exploit Agent: Impact assessment and pivot analysis
Each sub-agent maintains its own mission planning creating local autonomy, while the Orchestrator retains top-level process control through evaluation
Each sub-agent has access to specific tools tailored to its role, ensuring efficient and focused operations.
Prerequisites
System Requirements
- Operating System: Linux (recommended), macOS, or Windows with WSL2
- RAM: Minimum 2GB (4GB recommended)
- Disk Space: 2GB+ including Docker images
- Docker: 20.10+ with Docker Compose
- Python: 3.12 (via uv - recommended)
Software Dependencies
BlacksmithAI relies on the following tools:
# Python package & environment manager
uv

# Containerization
Docker & Docker Compose

# Frontend runtime & tooling
Node.js 18+ (LTS recommended)
pnpm (fast JavaScript package manager)
1. Python: uv
uv is a fast, modern Python package manager + environment tool — kind of like a turbocharged combo of pip, pipx, and virtualenv. ([GitHub][1])
Install uv
macOS & Ubuntu / Linux
# Install via official install script
curl -LsSf https://astral.sh/uv/install.sh | sh
If you prefer a Python-packaged version:
pip install uv
# or
pipx install uv
Verify:
uv --version
Notes:
- Standalone script is recommended for full functionality and auto-updates.
- On Windows use PowerShell:
powershell -ExecutionPolicy ByPass -c "irm https://astral.sh/uv/install.ps1 | iex"
Read uv docs for detailed setup - https://docs.astral.sh/uv/
2. Docker & Docker Compose
Docker lets us containerize and run backend services, databases, etc.
Install on Ubuntu / Debian
sudo apt update
sudo apt install -y docker.io docker-compose
macOS
brew install --cask docker
After installing, start Docker Desktop and confirm:
docker --version
docker compose version
If you see version outputs, you’re good to go.
Tip: On Linux you may want to add your user to the docker group:
sudo usermod -aG docker $USER
# Then restart your terminal
3. Node.js 18+ (OPTIONAL)
We use Node.js for frontend tooling. Node 18+ is required for modern pnpm and ecosystem compatibility.
Ubuntu / Debian
# Using NodeSource setup (recommended for precise versions)
curl -fsSL https://deb.nodesource.com/setup_18.x | sudo -E bash -
sudo apt install -y nodejs
macOS
Install with Homebrew:
brew install node@18
Verify:
node --version
npm --version
4. pnpm (Fast JavaScript Package Manager)
pnpm is preferred for consistent, fast installs and predictable lockfiles. ([pnpm.cn][4])
Install pnpm
You can install via one of these:
From npm
npm install -g pnpm
Using standalone script (npm not required)
curl -fsSL https://get.pnpm.io/install.sh | sh -
With Corepack (Node.js bundled tool manager)
corepack enable
corepack prepare pnpm@latest --activate
Verify:
pnpm --version
Verify Your Dev Environment
Try these checks:
uv --version
node --version
pnpm --version
docker --version
docker compose version
vLLM setup
if you want to use vLLM local models
setup vLLM
cd blacksmithAI/blacksmithAI
uv add vllm
uv add huggingface_hub

uv run hf auth login #if not logged in
Serve
e.g.
vllm serve mistralai/Devstral-2-123B-Instruct-2512 \
  --host 0.0.0.0 \
  --port 8000 \
  --max-model-len 8192 \
  --gpu-memory-utilization 0.75
Installation
Step 1: Clone the Repository
git clone https://github.com/yohannesgk/blacksmith.git
Step 2: Install Python Dependencies
# Install dependencies using uv
cd blacksmithAI/blacksmithAI
uv sync
Step 3: Build the mini-kali Docker Image
The mini-kali container provides all penetration testing tools in a secure, isolated environment.
# start it with
cd blacksmithAI/blacksmithAI
docker compose up -d
Step 4: Install Frontend Dependencies (Optional)
Skip this if using the terminal-only interface.
cd blacksmithAI/frontend
pnpm install
cd ../..
Quick Start with Makefile
For a simpler setup experience, use the provided Makefile commands. Run make help to see all available commands.
Complete Setup (One-Command)
make setup
This command performs:
- Python dependency installation (
make install) - Docker image building (
make docker-build) - Frontend dependency installation (
make frontend-install)
Initial Configuration
After setup or installation, configure your environment:
# 1. Copy example environment file
cp blacksmithAI/.env.example blacksmithAI/.env

# 2. Edit .env with your API keys
nano blacksmithAI/.env

# 3. Edit config.json for your LLM provider
nano blacksmithAI/config.json
Running BlacksmithAI
CLI Mode
make start-cli
Starts the mini-kali Docker container and Launches the CLI interface
OR
uv run main.py
Just launches the CLI interface
Web UI Mode
Run these commands in separate terminals:
# Terminal 1: Start Docker container
make docker-up

# Terminal 2: Start frontend
cd frontend && pnpm build && pnpm start

# Terminal 3: Start LangGraph server
cd blacksmithAI && uv run langgraph up # production server
>or
cd blacksmithAI && uv run langgraph dev # dev server
Then access: http://localhost:3000
Using VLLM (Local LLM)
# Install VLLM
make vllm-install

# Start VLLM server
make vllm-serve
# Or for smaller systems:
make vllm-serve-small
Available Makefile Commands
| Command | Description |
|---|---|
make help | Show all available commands |
make install | Install Python dependencies |
make setup | Complete initial setup |
make frontend-install | Install frontend dependencies |
make docker-build | Build mini-kali Docker image |
make docker-up | Start Docker container |
make docker-down | Stop Docker container |
make docker-logs | View Docker logs |
make vllm-install | Install VLLM for local LLM |
make vllm-serve | Start VLLM server (123B model) |
make vllm-serve-small | Start VLLM server (7B model) |
make start-cli | Start CLI mode |
make start-ui | Show Web UI setup instructions |
make start-all | Quick start CLI mode |
make stop | Stop all services |
make clean | Clean up Docker containers |
make status | Show Docker container status |
make check-deps | Check if dependencies are installed |
make check-config | Check configuration files |
make quickstart | Display quick start guide |
Quick Reference
# First time setup
make setup
cp blacksmithAI/.env.example blacksmithAI/.env
# Edit .env with your API keys

# Start CLI
make start-cli

# Start Web UI (3 terminals)
make docker-up
cd frontend && pnpm build && pnpm start
cd blacksmithAI && uv run langgraph dev

# Stop everything
make stop
Configuration
Environment Variables
Create a .env file from the example:
cp blacksmithAI/.env.example blacksmithAI/.env
Using OpenRouter (Cloud LLM Provider)
Edit .env and add your API key:
OPENROUTER_API_KEY=your-openrouter-api-key-here
Using VLLM (Local LLM Provider)
No environment variables needed. Ensure your VLLM server is running:
# Example VLLM server startup
vllm serve <model-name> --port 8000
Application Configuration
Edit blacksmithAI/config.json to configure LLM providers and models.
{
  "defaults": {
    "provider": "openrouter",  // or "vllm", or custom(openai)
  },
  "providers": {
    "openrouter": {
      "base_url": "https://openrouter.ai/api/v1/chat/completions", # inference url
      "default_model": "mistralai/devstral-2512:free", # model name
      "default_embedding_model": "openai/text-embedding-3-small",
      "def